Doesn't everyone need a koozie? My hubby loves them. So, Happy Father's Day. You are the best dad, and you help keep me sane. I love you! I hunted for a koozie tutorial or pattern, and I couldn't find one I liked. So, it was up to my own brain and a dash of help from a friend for the design.
You'll need:
You'll need:
-
1 fat quarter or scrap of fabric. The inner lining can be the shiny silver insulbright.
- Small bit of cotton batting
1/4 inch elastic or use whatever size you have on hand.
Thread to match, scissors or rotary cutter, and sewing machine.
I cut the outer fabric, inner lining, and batting at 4 1/4 x 8 1/2 inches
I cut 2 pieces of 1/4 inch elastic at 2 inches
Heat Bond for applique if needed
This is the shiny side of the Heat Bond that I iron to the fabric per instructions on Heat Bond.
I am going to iron this down onto fabric. It will stick to it. Then, I will cut out the design.
Once you have cut out the design. You will peel off the paper like a sticker and place these on the fabic where you want them appliqued and iron. It will stick to the fabric. Heat Bond is one of my favorite things. I thought this would be scary, but it isn't. It makes cutting small pieces very easy.
I want the batting, then outer fabric right side up (meaning-you can see the pattern on the fabric). I put the two pieces of elastic on one the right side of the fabric about 1 inch away from the top and bottom. Pin the elastic down.. The last layer is the backing. Place it wrong side up.
Pin it. I just keep it all lined up. Take it over the the sewing machine and sew around the outside. You will want to go over the elastic a couple times for security.
It nice with this thread. You can see what it looks like. I left about a 3 inch opening on the opposite end of the elastic. Back stitching on each side of the opening.
I trimmed the edges and the corners for better turning.
This is turned.
Before I get to the elastic, I am going to topstitch around the edge and leave the left side open for the elastic. I used the matching thread here.
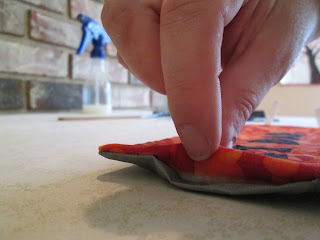
I tucked the fabric on the open end here.
I am going to slip in the elastic about 1/2 inch.
I am going to wrap the elastic to the back and pin it. Now, when I stitch the side together, the elastic will be sewn to the under side. This is the only way that I found that I didn't have to fight with it.
Now, when I stitch the side together, the elastic will be sewn to the under side. This is the only way that I found that I didn't have to fight with it. After thought, I could've just pinned them regular and used the arm sleeve on my machine. My machine is sunk down. So, this is just as good.
Here's another look before I sew it. I am going to go over the elastic and sew it.
It's not the neatest but no one is going to be looking at that part. Haha. Now, it's time for a cold drink. I hope you liked this one. Pretty easy peasy. Blog at ya later.


.JPG)


.JPG)
.JPG)
.JPG)
.JPG)
.JPG)


No comments
Post a Comment