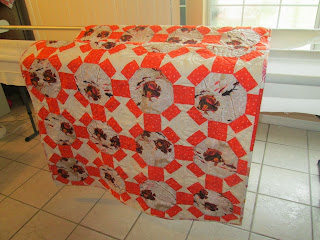
So, now we come to size and how much binding. I like 2 1/2 inch strips. The quilt measures 46"x70". I calculate the top measurement 46x2=92 and side 70 x2=140 and add about 10 inches. 92+140+10=242 I usually keep the extra that's leftover stashed in a drawer. You never know when you might need to bind something small or make a little strap.
I use a single fold binding here.
I cut those strips out. Now, I attach them right sides together.
Then, I press open the seam. This takes care of the bulk.
I just iron it right in half. On a smaller project that I am not going to be handling as much, I use a double fold.
I normally just leave the binding free and everything, but I thought I would give it a photo op moment.
Such pretty binding.
A walking foot is awesome here. It glides better over all the fabrics. I don't have a walking foot for the Janome, Since it is for upholstery, it can handle the layers. I leave 5 inch tail when I start out. I backstitch on the beginning.
I just line it up and go. When you are approaching the corner, you will stop a 1/4 inch from the edge. You can backstitch here too. Also, if you don't want to guess at the 1/4 inch stopping point. You could use a marking pen here.
Now, we are going to flip the binding back until it is running parallel with the next side that you are going to be sewing. I give that little 45 degree fold a little finger press.
I like to keep my finger on that 45 degree angle, but I had to hold the camera. Then, I flip the binding back down in the direction I am going to sew from the edge and backstitch.
You can see the 45 degree angle here. You can kind of see what the folding action looks like here. Just repeat on all corners.

I overlap the binding and mark it where the seam will be at. Then turn them over right sides together. Don't twist it. It happens. This is why you will like to leave the tail. Because you will need to fold up the quilt a bit to finagle it under the machine. Watch out for pulling.
I should have drawn a line here. Sorry about that. I have matched up the markings on the other side.
Now trim off excess. I would never suggest trimming first. Because I have completely had it twisted on previous occasions. Blah! You don't want that. My seam ripper is always handy. Lay flat and sew down.
I press the binding out away from the backing. This is also good. Because you can make sure that nothing got missed and everything is attached the way it should be.
Instead of pinning, roll with me, I am going to glue. Yep, glue. I have used this on the backing, and it worked really well. The prep is just as long as pinning. So, nothing lost there. Then, fold it down and iron it.
Then, fold it down and iron it down.
Here we are at the corner. You are going to give it a finger or iron press all the way out past the corner where it is making a 45 degree crease.
Now just lay the open side down, and make sure it matches at the bottom. If you look on the back the fold will be going in the opposite direction, and that's right.
Stitch it from the back in the ditch as shown above here.
This is what the front looks like. There is a lot of overhang. I guess, I could've cut the strips at 2 1/4"
I set the machine to needle down. Then, pivot.
This is what it looks like on the other side.
Now, the glue may not have really stuck here. This is what I am talking about with this method. Luckily, it was only that one spot that was like this. Yay! This is also why I didn't want to cut the strip smaller.
It's done! Hopefully this binding tutorial helps.
I hope all your quilting go smoothly! Blog at ya later!


No comments
Post a Comment