May 10, 2013

Teacher's Appreciation Mug Rug's

     There's always a holiday or something special to prepare for with gifts. Like Mother's Day, I got plans for that already. This is about Teacher's Appreciation. I do appreciate all they do for my kids, and making a little gift is fun for me as well. There's a little koozie surprise that I snuck in here.

Mug Rugs are on the agenda. I started out with her 1st grade teacher.
 
 
Mug Rugs - Used for drink and a snack, or just for the cuteness factor. It's 5 by 9 inches.


This is for the art teacher. I hope he likes fish. We are in Pensacola, FL. Salt Life stickers are everywhere. Plus, it was  the only manly fabric I have. LOL

 
This one is for the music teacher. I was getting a little tired by this time. I quilted do re mi from the Sound of Music. It's subtle. I should've used another color of thread. Whoops. By the time I thought of that, I was done quilting it, and I would've had to start over. So not happening!

 
Here we have the blue mountains in a koozie. This is for the P.E. teacher. Tutorial coming soon!
 
It made me think of this song...I had to add it.


The birdies are all getting their feathers now. Beautiful little things.


May 2, 2013

Some finishes

I finally got the little tabs on to hang my coffee trio that I made some 6 months ago. I have a 3rd panel, but there was no other spot. We got a large picture for over the dining table. That's where they were meant to go. So, I'll just swap it out occasionally.  I finished these in like 10 minutes. I have no idea why I put things off. It's ridiculous. 

 
In the last post, I showed you the cute birdie eggs that moved into our backyard. OMG, they hatched. Of course they did. Hubby and I  risked being dive bombed for these photos. Seriously, it swooped right by my head. I could hear the wind. I covered my eyes immediately.


You can see all the way down this lil guys throat.
 
 
I finished a bunch of new items for the shop. Hopefully, Mother's Day will be the first sale. Shop here.
 

Pincushion tutorial here.


Who knew hand towels could be so stinkin' cute?

 
This set  is my favorite. It was my most creative moment today. :)

 
I love coffee!
 

Enjoy your sewing. Blog at ya later.

April 21, 2013

Finished with Noah's Ark 2 quilt

      While he's laying on the couch, I pinned the Noah's Ark quilt to get it ready for quilting. I wanted to go visit my friend Ayna, but everyone has been sick with the flu. It just didn't work out. So, she was here for morale support on Skype. She made this owl pillow from the tutorial here.

 It turned out so cute.  She added a cute pocket and a cute embroidered the name on it. Cute, cute, cute.  I told her our whole family needs one with each of our names on it. So, I am trying to come up with an idea of something amazing to make for her. I am at a loss. Any ideas???


 I did a basic meander pattern in the middle. I echoed the white in the pinwheels and a border back and for the snake like pattern in the white polka dot border. I did a simple binding by  wrapping the fabric to the front. This is my favorite method.

This is a one of a kind and available for purchase here.
 
 
 The Noah's Ark Quilt 2 came out good. Now, I can say that I've done pinwheels . I enjoyed it.
 
I went to a bridal shower, and I made this double potholder. Tutorial here.
 
 
The kids found a bird nest. The eggs are really pretty. We are not sure what the actual bird is called. We think it's a sparrow. Now, there are 4 eggs.


This is Jared's room. His carpet was trashed, and Roxie tore it at the entrance to the door. So, we put duck tape on the threshold. It was not appealing. Home Depot had an amazing deal on laminate, and this is what happens. I think we are reno crazy.


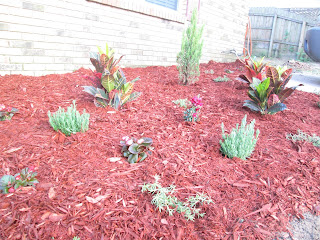
This was a bunch of weeds and a really ugly bush. We went and looked at pavers, but ended up with flowers, and one long morning putting these in these plants.  The entry planting took place two weeks after laying the flooring in Jared's room. This is exactly what I am talking about reno crazy.  This is my first attempt at gardening, or just dealing with plants. We actually have two lemon trees that need to be planted in the backyard.


I am blogging two weeks after the front plants were put in, and we just knocked down my Mother-in-law's screened in porch. I am tired and sore.  I am sure in the recesses of my mind, I am thinking of another Reno (living room) hahaha.
 
Blog at ya later.


April 17, 2013

Dresden Plate Tutorial


 I finally got around to my Dresden Plate. I felt that I accomplished something small with the Noah's Ark 2 quilt. So, I started working on these Dresden Plates. I bought a template at Joann's for the pieces and the center. I made my own template for the backing.
 I am not the quickest blogger or quilter. Some blogs are just post happy. I love those kinds. I would really love it if people that stop by could follow me. I have tons of visitors. Leave me a comment. Let me know what you are thinking or making.
I love how these turned out. I have them for sale here.
 
 
This is an 8 inch template. I squared up the fabric and cut off an 8 inch strip and cut out my pieces.


I take my piece


fold the top of the wedge in half  right sides together.


I sew the open side all the way to the fold along the top. Once the piece is sewn, I grab the next piece and continue sewing.


This forms a chain of pieces. You can do them all at once. I like to sew one Dresden at a time. This is 20 pieces.
 
 
I took them over to the ironing board and cut them apart. Here at the upper side where it is sewn, my finger is on the fold pointing to the little angle edge that I snipped to make it easier for turning.
 
 
I am going to turn top part so that it looks like the picture below.

 
At the left edge is the turning tool the I used to make the top points on my pieces. You can use a pencil or skewers from the kitchen. Same concept really.

 
I just pressed this one. 1 down 19 to go.
 
 
Here's the other side.

 
I laid them out in the order I liked.

 
I picked up two. I lined them up right sides together. the bottom point on the triangle is really the important part to line up and sew right down the side.
 

This is what the set look like opened up.

 
I took the third place and lined it up and sewed it on and so on..

 
Just keep adding.


I am almost finished here. The last piece has been sewn.


Now, I just fold the Dresden in half and sew the last seam right sides together.
 
 
This is the back. I found a tray that would hide the seams. I traced it out on some pieced cardboard from a cereal box. Nothing fancy.
 
 
Here it is.


The white paper is cut smaller than the backing template for the batting. I used the paper on this so that I can pin it to the batting.
 
 
I cut the batting out.


The backing fabric was just cut a bit bigger than the template. It doesn't need to be super accurate. No one will see this part.


I really don't have the best starch sprayer. I will have to remedy this. I just held the template with one hand and ironed the other side with the template still in place. I removed the template and layered the top, fusible batting, and backing.  Sew around the edge of the circle on the back.

 
Now, I am going to put on the center circle in the front. Just sew that around the edge. You can get creative with your stitches here. Maybe, a blanket stitch or zigzag. I just went with straight stitches.

 
 Now, it's time to quilt them.
 
Most Dresdens that I have seen were place onto a square of fabric and sewn down. Then batting and backing.

 
I really love how the back turned out. I might even like this side better.
 

These are available here.


Time to get back in the sewing den. Blog at ya later.
 

© Quilty Dream
Maira Gall